Tutorial for Accessing NFT Data Using Datalayer
Tutorial for Accessing NFT Data Using Datalayer

Datalayer is a specialized component within DeCommas Mission Control API, providing Web3 developers with simplified data access to indexed Blockchain, NFT, and Protocol data. It accelerates development, and empowers developers to deliver quality results.
When it comes to developing Web3 features, NFTs are unavoidable, and that’s where NFT querying comes in.
NFT querying is simple — it’s like asking about special digital things. You can find out who owns NFTs, like art or collectibles, and see what happened to them. It’s similar to using a tool to gather information about unique online items. We can easily teach you how to do it with your apps.
But before we start, let’s understand what NFT metadata means.
What is NFT Metadata?
NFT metadata is a set of data that describe the characteristics of NFT, and is usually specified in a JavaScript Object Notation (JSON) format. Imagine a digital trading card — it would have its name, a description, who made it, the picture or sound it has, when it was made, if it’s a limited edition, and what makes it different. This info helps people understand why it’s unique and special for them. And guess what? All this is kept safe on the blockchain, along with who owns it. Just like how Web3 fans are looking for new and smart ways to keep an eye on their digital goodies.
If the NFTs topic still needs more clarification, you can still rely on Doubloin and their comprehensive overview of “What Is NFT? NFTs Complete Guide 2023.” This article will provide you with more information about NFTs before you start building your own web3 app.
NFT metadata helps developers show and organize NFTs. It also makes sure NFTs are real, follows rules for transactions, and works nicely for users.
Tutorial: Accessing NFT data using Mission Control API
In today’s tutorial we’ll be exploring how the DeCommas Mission Control API can be used to access NFT data for your app. Here’s what we’ll do in this tutorial:
-
Learn how to get your Mission Control API key.
-
Set up the Mission Control API in your environment.
-
Explore three key features to access NFT data:
- Display details about NFTs owned by a certain address.
- Fetch metadata for a specific NFT token.
- Create an overview of NFT transfers, including incoming ones.
Ready to begin? Let’s start!
Get your personal Mission Control API key
For this tutorial you need DeCommas Mission Control API, which is free to use, cross-chain by default and achieves market-leading response-times of below 150ms.
Gaining access is simple:
- Head to https://build.decommas.io/
- Click “Get Started”
- Enter your email address
- Check your email and click the link to sing in
- You are now redirected to https://dashboard.decommas.io/, which contains your API keys
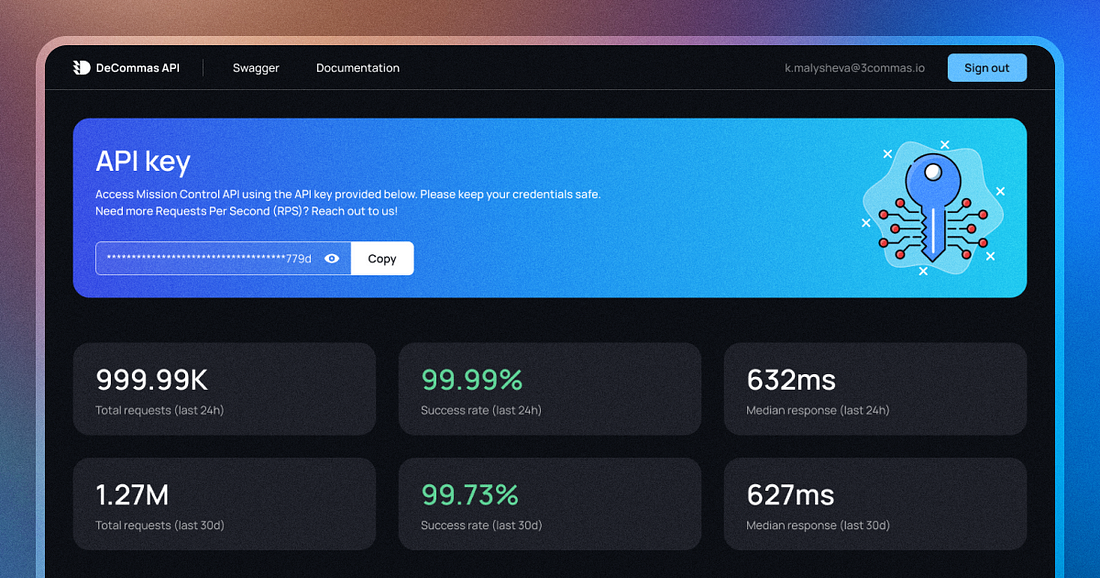
API keys
Make sure you’ve got your API keys ready. Copy and paste them to a spot where you can easily find them, but keep them safe too. Also, our tutorial will be super helpful, so keep it handy at this link: https://docs.decommas.io/
Setting up Mission Control API in your environment
You can set up the Mission Control API in your environment using either of these two methods.: one is via a raw HTTPS request, and the other is using a special toolkit if you’re into JavaScript.
If you choose the first option, the call will appear as follows:
https://datalayer.decommas.net/datalayer/api/v1/tokens/{address}?api-key={YOUR-API-KEY}But if you’re more of a JavaScript whiz, we’ve got a kit for you. We know you love coding, so here’s the deal: we’ve got a super-easy toolkit called the DeCommas Mission Control SDK. You can grab it from here:https://github.com/DeCommas/decommas-sdk.
Here’s how to start:
- Put the Mission Control API inside your Javascript environment by typing:
npm install @decommas/sdk- Once that’s done, just copy and paste the following code:
import { Decommas } from '@decommas/sdk';

const decommas = new Decommas();

const getVitalikERC20Balances = async () => {
  const address = '0xd8dA6BF26964aF9D7eEd9e03E53415D37aA96045'; // any address
  const tokens = await decommas.address.getTokens({ address });
  console.log(tokens);
};
Now you’re all set to make full use of the DeCommas Mission Control API!
Check NFTs owned by specific address
If you’re curious about the NFTs associated with a specific address, all you need to do is make an API call using the following method. This allows you to discover the NFTs owned by that address and gain a better understanding of the tokens they possess. So let’s use ”NFTs” endpoint for it, like this one:
https://datalayer.decommas.net/datalayer/api/v1/nfts/0xd8dA6BF26964aF9D7eEd9e03E53415D37aA96045?api-key=<YOUR_API_KEY>All examples were made with Vitalik Buterin’s wallet.
Or using JavaScript SDK (SDK quickstart guide):
import { Decommas } from '@decommas/sdk';

const API_KEY = "YOUR_API_KEY";
const decommas = new Decommas(API_KEY);

const getNftsOnWallet = async () => {
  const getNftsParams = {
    address: '0xd8dA6BF26964aF9D7eEd9e03E53415D37aA96045'
  };
  const nfts = await decommas.address.getNfts(getNftsParams);
  console.log(nfts);
};

getNftsOnWallet();
You will get the next response:
{
"count":143,
"status":200,
"result":
 [
  {
   "chain_name":"mainnet",
   "chain_id":1,
   "contract_address":"0x7ae8ec49dfa6d7a8351606b4dc9929fe7bf6919d",
   "token_id":"1",
   "amount":"14040000",
   "contract_type":"ERC-1155"
   },
 {
     "chain_name":"polygon",
     "chain_id":137,
     "contract_address":"0xda53e8e1d06fe5f6e96d43b73d6b69a1d168d298",
     "token_id":"119",
     "amount":"1",
     "contract_type":"ERC-721"
    }
    ...
  ]
}
This code tells you about different tokens, like where they’re from, their details, IDs, amounts, and what type they are. You can use this info to show users the tokens they have and sort them by how much of each they own. It’s like making a simple list of what they’ve got. Now you can see in your app that it has the basics about NFT balances for a wallet in the “amount” variable. Also, there’s a unique trick with the “chain_name” variable: it indicates the chain an NFT belongs to, in this case, it’s Polygon. This helps you sort NFTs by chains. Depending on your goals, you might want to adjust different settings accordingly.
Now let’s try to get more info about one NFT on the wallet
Metadata for specific NFT token
If you want to see info about NFTs, just make a request using the “NFT metadata” endpoint. This lets you check out details about each NFT and distinguish each one according to their metadata.
Let’s use JavaScript SDK for that:
import { Decommas, ChainName } from '@decommas/sdk';

const API_KEY = "YOUR_API_KEY";
const decommas = new Decommas(API_KEY);

const getNftMetadata = async () => {
  const getNftParams = {
    chainName: ChainName.POLYGON,
    contractAddress: "0xda53e8e1d06fe5f6e96d43b73d6b69a1d168d298",
    tokenId: 119,
    }

 const nftMetadata = await decommas.metadata.getNft(getNftParams);
 console.log(nftMetadata);
};

getNftMetadata();
You will get the next response:
{
"status": 200,
"result":
    {
       "chain_name": "polygon",
       "chain_id": 137,
       "Contract_address": "0xda53e8e1d06fe5f6e96d43b73d6b69a1d168d298",
       "token_id": "119",
       "name": "#119",
       "image_url": "https://api.paulygon.io/api/v1/backend_service/render/dna/0x24280c001d10060c0f0000000000000000000000000000000000000000000000",
       "animation_url": null,
       "contract_type": "ERC-721",
       "collection_name": "Paulys",
       "collection_verified": false
  }
}
This response gives you info about a special token on the Polygon network. It tells you things like the token’s picture, its name “#119”, and whether it’s part of a verified collection called “Paulys”. This could be used to show users details about this particular token. And now you can render an NFT image or other media if it has a collection name. The last thing you might want to know about NFTs is about checking NFT transfers.
Info about NFT transfers including incoming transfers
If you want to find out which NFTs are sent to or from a wallet, just check the “NFT Transfers” endpoint using JavaScript SDK:
import { Decommas } from '@decommas/sdk';

const API_KEY = "YOUR_API_KEY";
const decommas = new Decommas(API_KEY);

const getNftTransfers = async () => {
  const getNftsParams = {
    address: '0xd8dA6BF26964aF9D7eEd9e03E53415D37aA96045'
  };

  const nfts = await decommas.address.getNftTransfers(getNftsParams);
  console.log(nfts);
};

getNftTransfers();
You will get the next response:
{
 "status": 200,
   "result": [
       {
           "chain_name": "polygon",
           "chain_id": 137,
           "block_number": 45819960,
           "block_timestamp": 1690981097,
           "log_index": 1666,
           "from_address": "0x0000000000000000000000000000000000000000",
           "to_address": "0xd8da6bf26964af9d7eed9e03e53415d37aa96045",
           "contract_address": "0x5ab1fceba343fca3a0d97c97c042eb9609c74286",
           "token_id": "5505",
           "contract_type": "ERC-1155",
           "amount": "1",
           "transaction_hash": "0x9768a77bc60ec3e21df6868d17bef57f52325b467ed74c3a606e63506a846cd9",
           "method": "mintBatch",
           "method_hash": "0x927f59ba"
       },
   ...
   ]
}
Here you can see information about a token transaction on the Polygon network. It tells you when it happened, who sent and got the tokens, how many tokens, and more. You can see what method was used for the transaction too, like “mintBatch”. This helps you follow who’s trading what tokens on the network.
Wrapping up — Your first steps to building your web3 app to track NFT data
We’ve made a complete overview of DeCommas API related to NFT, now you can get all essential info about this type of asset. If you’d like to make advanced requests, see how you can work with limit and offset params or filter response by specific networks, you can check our docs and for more details about JavaScript SDK visit its GitHub repo. To build Portfolio Tracker features, take a look at this tutorial.
Enjoyed learning more about web3 development and DeCommas’ Mission Control API? Keep an eye out for more, right here on our Medium.